I know, I know… the nineties called, and they want that bread maker back – and maybe the Alanis Morrissette c.d., too – but they can’t have either!
I am the proud owner of a bread maker, and I actually use it! I do make loaves of bread from time to time, but I find it is most useful for dough. The machine does all of the manual labour, and that speaks to the Lazybug that lives inside of me.
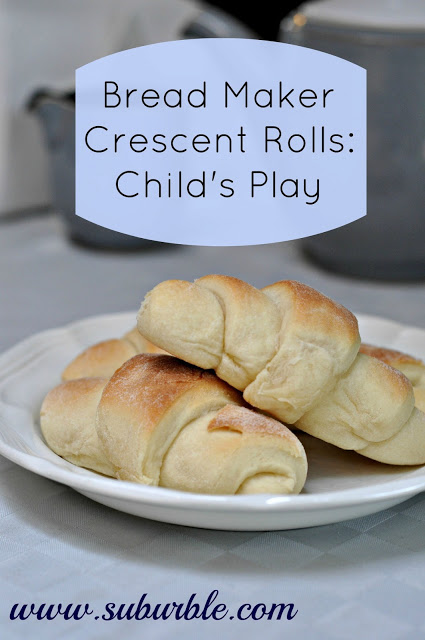
Today, Lila and I made homemade crescent rolls (not the kind you find in a tube in the refrigerated section) using our trusty “kneading machine”. Lila is a pro at the bread maker. If I measure out all of the ingredients and direct her, she can assemble them and get the machine to dough-making status all by herself.
We made the Sweet Dinner Rolls from Allrecipes.com. This recipe is quick, easy, and always a hit.
When making dough in the bread maker, the ingredients go in layers of liquid, dry, then yeast. From first to last, the ingredients are:
1/2 cup of warm water (must be warm to activate the yeast)
1/2 cup of warm milk (same deal as above)
1 egg
1/2 cup of butter, softened**
1/3 cup of white sugar
1 tsp of salt
3 3/4 cup of all purpose flour
1 package of active dry yeast
** You’ll need an extra 1/4 cup of butter when assembling the crescent rolls.
Make a well for the yeast; be careful not to dig so deep as to reach the liquid.
Ignore your mother and dump the yeast all willy-nilly.
Take out dough and split into two equal balls. Roll each ball into about a 12″ circle and then spread the 1/4 cup of softened butter across the surface.
Roll each triangle, beginning from the wide end to the point, into a tight little crescent shape. Please disregard the disintegrating tattoo on Lila’s right hand. I didn’t remember that it was there until reviewing the pictures.
Place completed crescent rolls (can you tell which ones had a four-year-old’s touch?) on a pan, then cover with a clean tea towel. I use a Silpat, because I love it and I think I have a co-dependent relationship with it. You don’t have to use any sort of liner. Also, be warned, some silicone liners cannot stand the same level of high heat, so be sure to check the standards of your own liner if you decide to use them in temperatures of 400 degrees and higher.
Leave rolls somewhere warm to rise for about an hour. In an oven with the oven light on is usually enough warmth.
When the hour is up, remove the tea towel and then put the crescent rolls in a 400 degree oven. If you used the oven as a warming place, you can take the rolls out a few minutes early to allow the oven to pre-heat.
Bake for about 10-15 minutes – watch them closely, as they brown very quickly. Take them out, let them cool for a few minutes, and then devour them. It helps to sometimes hide them under that tea towel as they cool, so you don’t continuously jam them in your face, leaving a crumb mustache and a guilty expression.
Not that I’ve ever done that…
But wait, there’s more!
If you’re feeling a bit cheeky and you want to dress up these fabulous little rolls, you can turn them into ham and cheese crescent rolls. I grated up some cheddar and sliced up some nice ham that we bought at a deli. We placed a small bit of both on the wide part of each crescent and then rolled them up tightly. Lila helped with this part, too, though I did have to re-roll her crescents as they must be rolled quite tighly to avoid cheese leakage. Is there a more formal term for that? Cheese meltiness?
We baked them at 400 degrees as well, but the ham and cheese variety of roll needs to bake for the full 15 minutes. I picked a few of them up off of the pan to be sure that the bottom was browned and that the sides were no longer soft, like dough.
Nothing says, “Good morning, Honey” like a mouthful of ham and raw dough. Blech.
Aren’t these so pretty? Look at that peek-a-boo cheese. They’re the perfect size for a grab-and-go breakfast that isn’t laden with preservatives or artificial anything.
We packed a few of these little darlings up into a (biodegradable!) takeaway container and brought them to Grandpa – Hubby’s dad – who is recovering from a recent shoulder surgery. He was my guinea pig for these little secret-meat-holders, and he gave them two – well, one, but the other’s busy in a sling – thumbs up!
If you try these out, please let me know. They’re one of my most favourite bread maker recipes, and I love that Lila can do most of the work on her own (under heavy surveillance, but isn’t that the life of every four year old?).





10 comments
Jenna LaFevor
Yum! These look delicious!
Jenna @ Rain on a Tin Roof
Kelly
I’m going to have to try these Tara. Nic will love a grab and go breakfast and I will love giving him tasty protein!
Tara @ Suburble
Hi Kelly!
Please let me know how they turn out! Hubby was quite pleased to have his share of the leftovers. I’m going to make a big batch and then freeze them in groups of three so that there’s always a quick bite to eat around here (keep the fast food cravings away).
Sofia
Tara,
I think these will absolutely help with the cravings for fast food and all that yummy but really unhealthy food out there. Thank you for sharing and as soon as I make them I will come back and tell you if we liked them or not.
Mary Stark
I can smell them baking from downtown Vancouver!
Tara @ Surburble
You’ll have to do brunch out this way sometime. I promise I’ll make them!
Di
Just made these for tomorrow “Turkey Day” I cooked them a little under done so I can finish them right before dinner. Thanks so much, have a Happy Thanksgiving!!!
Tara
Di – how did they turn out?!? I can imagine how delicious they would be with a bit of gravy!