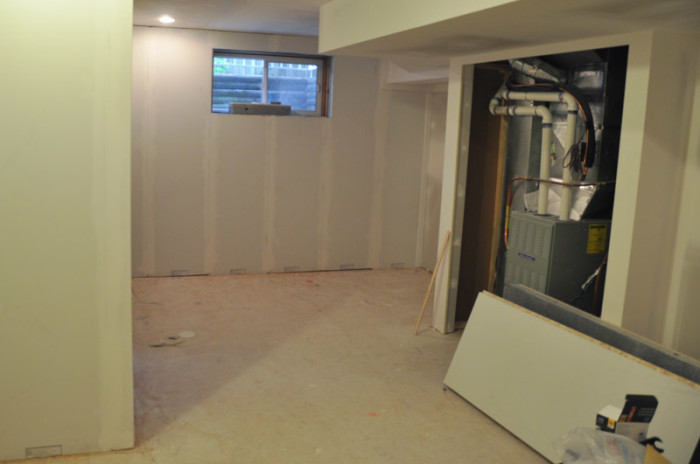
Yesterday, I talked about our basement renovation – and how DRIcore SMARTWALL is a big part of it.
You guys probably remember the “before” of my basement. It was something.
Something that was the opposite of cozy. Something that screamed, “Store stuff down here and forget it exists! This is not a place for humans!”
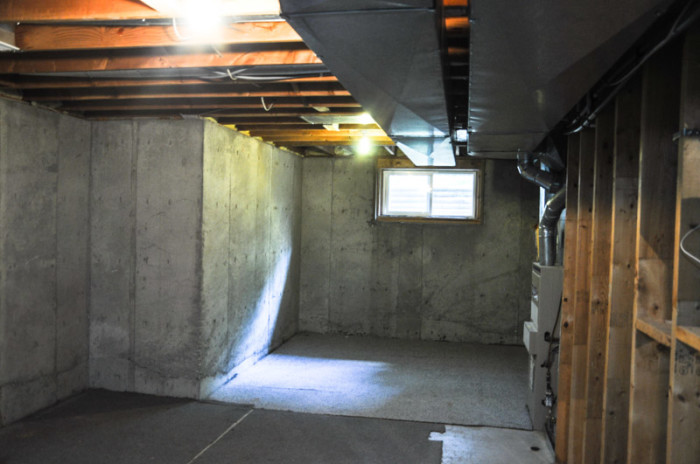
Mr. Suburble and I want this space to be human-friendly. Most importantly, we want it to be a place where this kid and her sister hang out.
A playroom in the basement is probably my biggest priority. I want a safe, clean space where the kids can be the messy, loud, wild things that they are. Is anyone else seeing the irony in that statement?
And I want all of this chaos kept at the bottom of the stairs.
We started our renovation with the installation of DRIcore subfloor (click the link to read about that). With that already ready to act as our foundation, it was time to start putting up walls.
Planning Our Space
SMARTWALL panels are approximately 2 feet wide by 8 feet tall. When we planned out our basement, we used the project calculator to figure out the number of panels that we needed. SMARTWALL panels can either be solid, primed panels – or they can have electrical or light switch boxes already set within the panel. Each panel is pre-ducted with for wiring – you just have to decide the layout of your basement.
We opted to have an electrical outlet approximately every 10 feet in the basement. It’s important to remember the layout of interior walls when considering where a light switch would go. Typically, switches are placed by entryways – so we had to think of that when mapping out our basement.
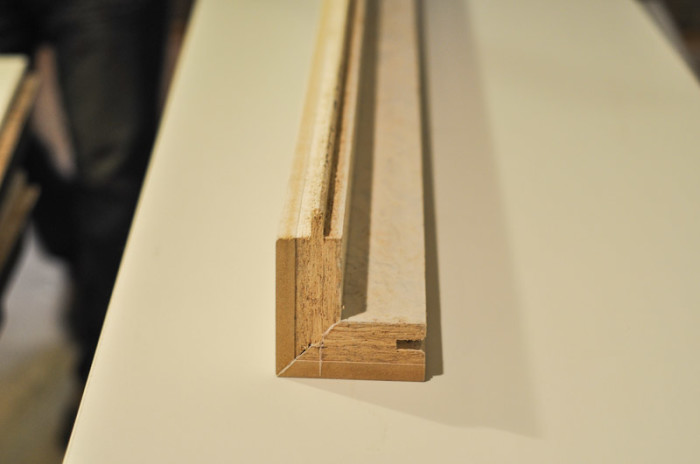
The SMARTWALL system uses tongue-and-groove corner pieces – we needed these for every outside corner (but not for an inside corner).
Getting Ready for Installation
The full, nitty-gritty details on installing SMARTWALL in a basement space is available here. In this post, I’ll share the highlights of our project.
SMARTWALL installation starts with some preparation. Pieces of 2X2 wood plating are installed on both the ceiling joists and on the DRIcore subfloor.
At the ceiling, the 2X2 is hugged right up to the concrete wall. From the edge of that piece of wood, you drop a plumb bob and mark it on the floor. From there, you measure 2 3/8″ out and install a second length of 2X2 to the floor. This is continued along the exterior walls of the basement. At the corners, you leave a 1/2 inch gap.
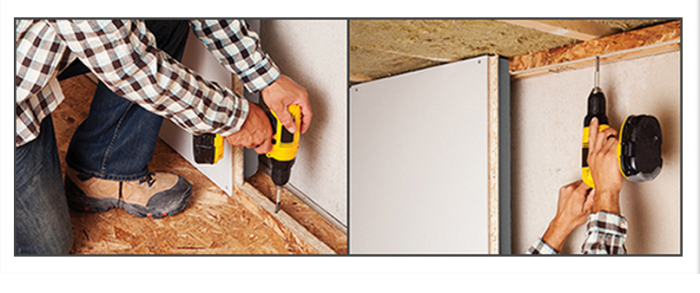 I borrowed this image from the DRIcore website – Thanks guys! (And the man with the yellow drill)
Note: You’ll see that our ceilings are drywalled in this post. You do NOT have to drywall ceiling before you install SMARTWALL. We had some timing issues with our drywaller and had him go ahead and do the ceiling prior. We already planned on finishing off the ceiling with crown moulding, so it worked for us. If you leave the ceiling exposed while installing SMARTWALL, you can tape the seam between the ceiling and the SMARTWALL (or do a dropped ceiling, etc) after you’ve finished installing.
Installing the SMARTWALL
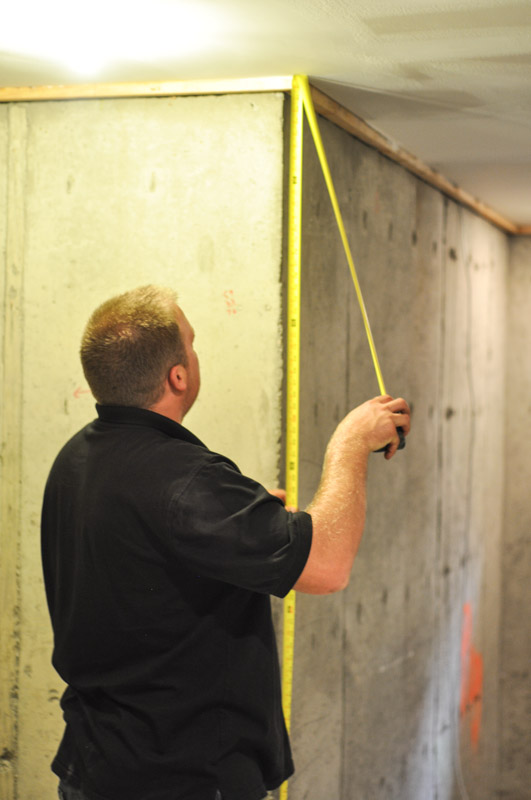
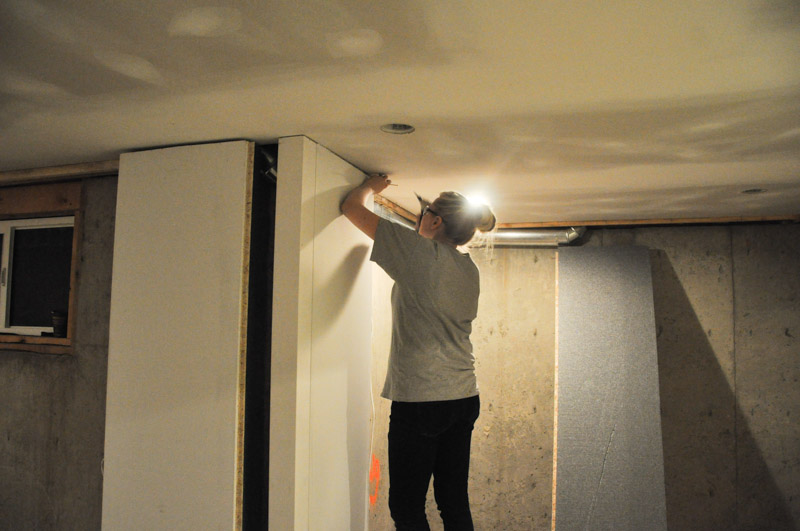
We started by taking out measurements and cutting our panels. Because we have a basement that has some outside corners, we needed to start there in order to work with the tongue and groove system. The corner piece was installed first, and then we worked our way out.
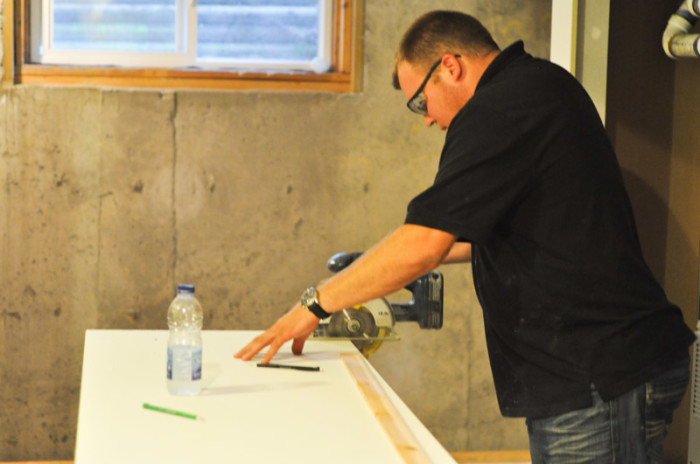
Like Kristen of Storefront Life found in her own SMARTWALL project, we found it easiest to cut the panels with a circular saw first – and then hand-saw through the remaining layer of foam insulation. The directions say that you can simply use a handsaw to cut through the panel, but the saw was much faster.
We don’t have a table saw, but we thought that might be a handy tool to try with SMARTWALL, too, if you’ve already got one lurking in the garage.
TIP: Make sure that your saw blade is sharp! If it’s dull, you’ll tear the drywall and paper on the front of the panel. And that’s no fun.
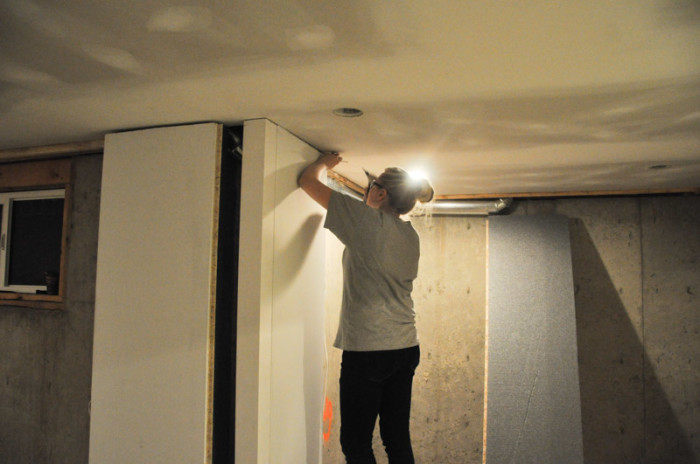
The panels are screwed into the wood plates on both the ceiling and the floor. You need 5″ screws for the ceiling (as the screws have to go through the entire width of the panel and into the 2X2) and you’ll need 2 1/2″ screws for the bottom of the panel. The reason for this is because the bottom of the panel is recessed; remember how the wood pieces were kicked out 2 3/8″ from the mark of the plum bob? It’s to account for the shape of the panel.
This is one of two reasons why the cuts are made at the top of the panel, instead of from the bottom. The second reason? To keep the ducting for the electrical always at the same height. If chunks of the bottom are lopped off, it’s going to be a hot mess for your electrical.
And your plugs will be only inches off of the ground. Awkward, to say the least.
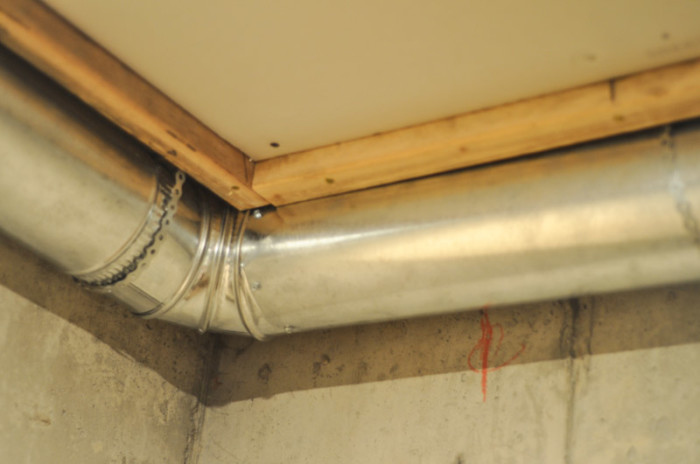
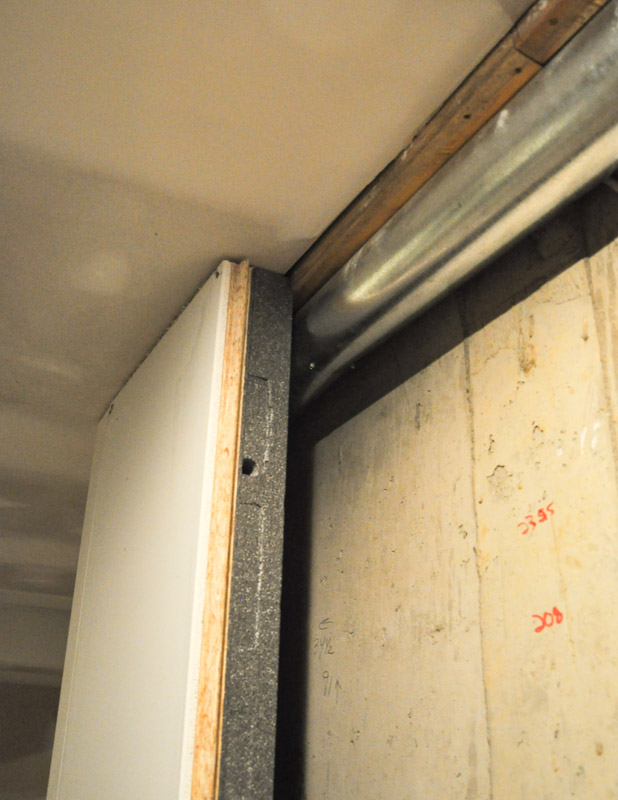
You’ll notice that in one section, we had some ductwork happening in the ceiling.
To avoid a bulkhead, the 2X2 was installed on the outside of the pipe…
… and the SMARTWALL was installed just as it was around the rest of the room.
This does mean that the wall sits out a bit further than its counterparts; however, it does save the hassle of framing and drywalling out a bulkhead for a strangely-placed duct.
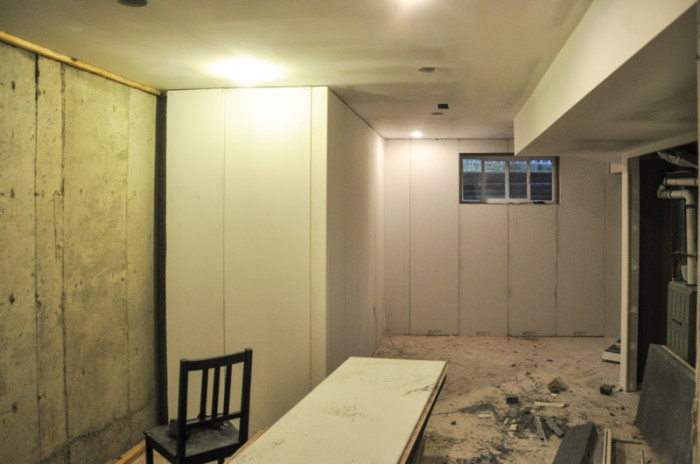
The installation went smoothly. We cut around the windows, securing the SMARTWALL in place. Eventually, we’re going to finish them with pieces of medite MDF and casing. (I’ll share all of that as we get to it)
We were dusting off our hands and sweeping up the mess by mid-Sunday afternoon. It took less than two days to finish our exterior basement walls!
TIP: SMARTWALL does make a bit of a mess when you cut it. The foam insulation loves to fly apart and make general merriment on the floor. Mr. Suburble decided that in the interests of having a harmonious relationship whilst we worked, we’d deal with the mess where we worked. Neither of us wanted to walk up and down the stairs to cut and bring down the panels.
However, be warned. If you don’t want to deal with the clean-up in your space, cut your panels outside or in a garage.
Next, was the putty:
Puttying the SMARTWALL:
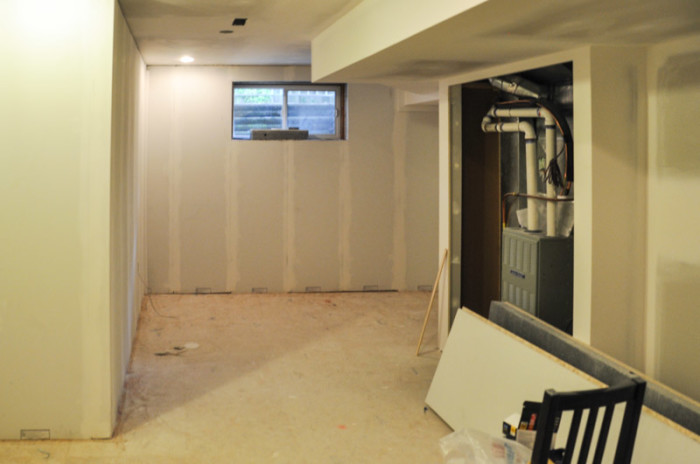
Now this is going to be an instance of “Do as I say, and not as I do.”
SMARTWALL has a small micro-bevel seam that runs between each panel. Using DRIcore’s Patch Pro, you apply two coats of putty onto each seam, being careful to remove as much excess as possible.
I repeat: remove as much excess as possible.
We cracked open the Patch Pro and puttied up the seams. For some reason, my brain completely forgot the part where I was supposed to take a trowel, wet it, and remove the excess putty off of the panel.
Don’t worry – I didn’t ruin the wall! I just had to do a bit of sanding that normally wouldn’t have to be done. So save yourself the bicep work-out, and wet the trowel.
The Final Step: Finishing
We’re so excited to be moving onto the next step in our basement. SMARTWALL is already primed and ready to paint; it’s just about picking the colours.
We’re still in the planning stages of the finishes in the basement, but we are going to be working away for the rest of this month. Lots of progress will be made!
Mr. Suburble is going to have a little man cave. With the long-coveted ping-pong table! And the kidlets are going to have their own space too – with toy storage, and a little spot to watch movies with friends.
I can’t wait to share the basement progress from here on out. We have so many plans… and so many projects. It’s a goldmine for a gal like me!
If you’re planning a basement space of your own, check out DRIcore’s website and their Facebook page. It’s amazing how slick their products are.
Disclosure: I am a DRIcorrespondent, which means that DRIcore provided the materials needed for this project. However, all opinions, thoughts, and poorly-lit basement photos in this post are mine. Thanks for being so awesome, DRIcore.






23 comments
Jo-Anna
Looks so fantastic Tara! I can’t wait to get started on ours…I’ll be coming back here for tips!
Tara
I can’t wait to see your project, Jo-Anna! It’s going to be fantastic!
Virginia Fynes
That doesn’t look hard at all! I think just about any novice handyman could tackle that project. What a difference it made.
Tara
It was crazy how it transformed the space as we went along… I feel like it’s already much more of a cozy, useable space.
amy @ one artsy mama
I am so impressed by all the work you guys are doing!
Tara
Thank you, Amy! 🙂
Adrianne
Very, very cool! It’s really coming along!
Tara
I know! This basement is going to be very well-loved once it’s completed. We can’t wait to use the space!
Marilyn
Tara, this product looks amazing and so easy to install! We have an old Victorian home (circa 1888) and so our basement is a pit that anyone over 5″6′ can’ts stand up in so we won’t be finishing our basement. However, their product might be good in another area of our home! 🙂
Tara
Oh wow… Marilyn, how did I not know that you have such a fabulous historical home? Oh my gosh, I want to see pictures. Are they on your blog?
Your basement sounds almost like a crawlspace, though. Is there a way to dig it out that last foot? Or just not worth it?
Melanie
I like that your kids will have a great place to play!
Tara
Me too. We had a playroom in the last house, and when we moved in here, we suddenly realized that until the basement is finished, the playroom is gone.
So I’m moving the basement up on the priority list. It will be nice to have that space for the girls.
Krista @ the happy housie
Wow Tara…it is crazy amazing that you guys did this on your own. Awesome!! It makes me believe that dricore is so amazing that even I could DIY it! What a cozier space already…amazing what drywall does!
Tara
I know! Isn’t it wild!?!? I can’t believe that soon, we are going to have an actual basement – one that we can play in, and have guests sleep in, and a majority of the work was done by us.
Bathroom excluded. I’m not a plumber. 😉
Melissa
Wow, this looks like some serious Reno business. I don’t know much about the behind the scenes stuff but that seems pretty cool that the walls already have outlets ready for electrical. Lookin’ good! Now for the fun part….painting!
Tara
Yes, it’s the painting, finishing and decorating that I LIVE for. I can’t wait until the basement is ready for running, jumping and playing. It’s going to be such a great space.
Marilyn
Your basement is going to be an amazing, usable space when you’re finished!
Alex @ Basement Finish Pros
Agree with you Marilyn. The space is prefect. Maybe they just need more decorations or colors to the wall. It make more pretty.
Dave
I plan on using Dri core wall system but I want to use the DMI my supplier says its much better than Dricore floor tiles and is more moisture proof for the subfloor…how does one attach the 2×2 to the floor, do I do it directly into the concrete
Tara
I’m not familiar with DMI flooring, but we attached the 2X2 directly to the DRIcore, I’m sure that you would do the same for whatever flooring foundation you put down. To be sure, contact the DRIcore customer service – they’re very helfpul. 🙂
Breandan Wheeler
Did you attach the subfloor to the concrete first? Dricore said they recommend attaching everything into the concrete.
Tara
Hi Breandan,
We used a concrete drill to attach the subfloor to the concrete where we felt it was uneven. I share how we installed the Dricore subfloor here: https://www.suburble.com/2014/08/basement-project-installing-dricore-subfloor.html
Let me know if you have any more questions!
Tara
Larry Schwartz
I have the panels but not installed yet. (surgery is keeping me at bay). If I could find some decent looking battens I could cover the seams instead of muding. Then the panels would be somewhat removable for things like basement wall inspection. (termites etc).