When we last left off with the Greenhouse Project, Mr. Suburble and I had worked our chiseled biceps out by churning concrete in a wheelbarrow.
And when I say, “Mr. Suburble and I”, I mean that he did all of the mixing, and I stood around and flexed.
Concrete mixing is really not very much fun, guys. If I could make any recommendation to you, it would be to rent a mixer and save your upper body the work.
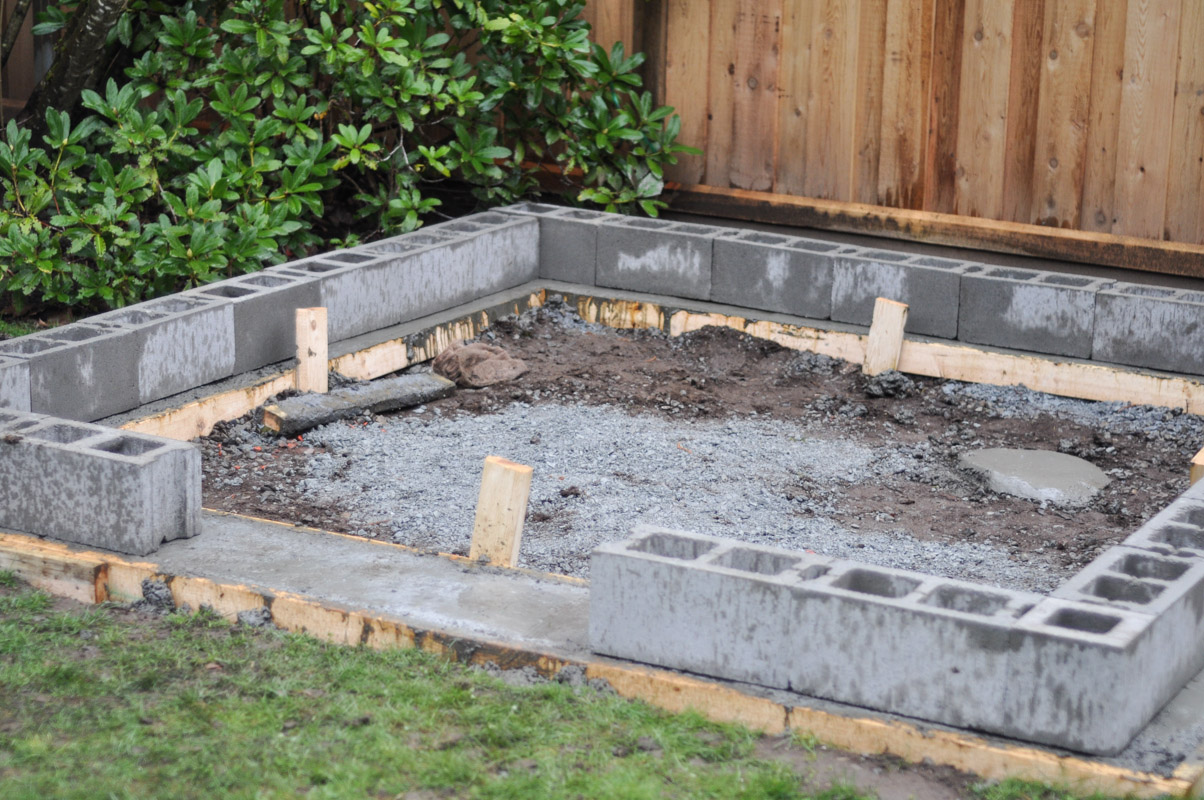
We had a concrete base, a first row of cinder blocks, and ready bar (rebar would work too!) drilled into the concrete base. It was time to start thinking vertically.
We stacked cinderblocks – in a brick pattern – three blocks high. We had measured the ready bar to ensure that it would be tall enough to clear the 24″ of brick as well as the pressure treated sill plate.
At this point, Mr. Suburble called in reinforcements. We had friends help us shovel concrete into the hollows of each brick as we build the foundation.
We admitted to ourselves, “This is perhaps a tiny bit overbuilt, this little greenhouse.”
But just like being overdressed for an event, when it comes to building, it’s better to be over than under.
And, after laughing at what I was now calling, “The Bunker”, my mom brought up that this foundation would provide some pretty awesome insulation for all of the baby plants that would live in the greenhouse.
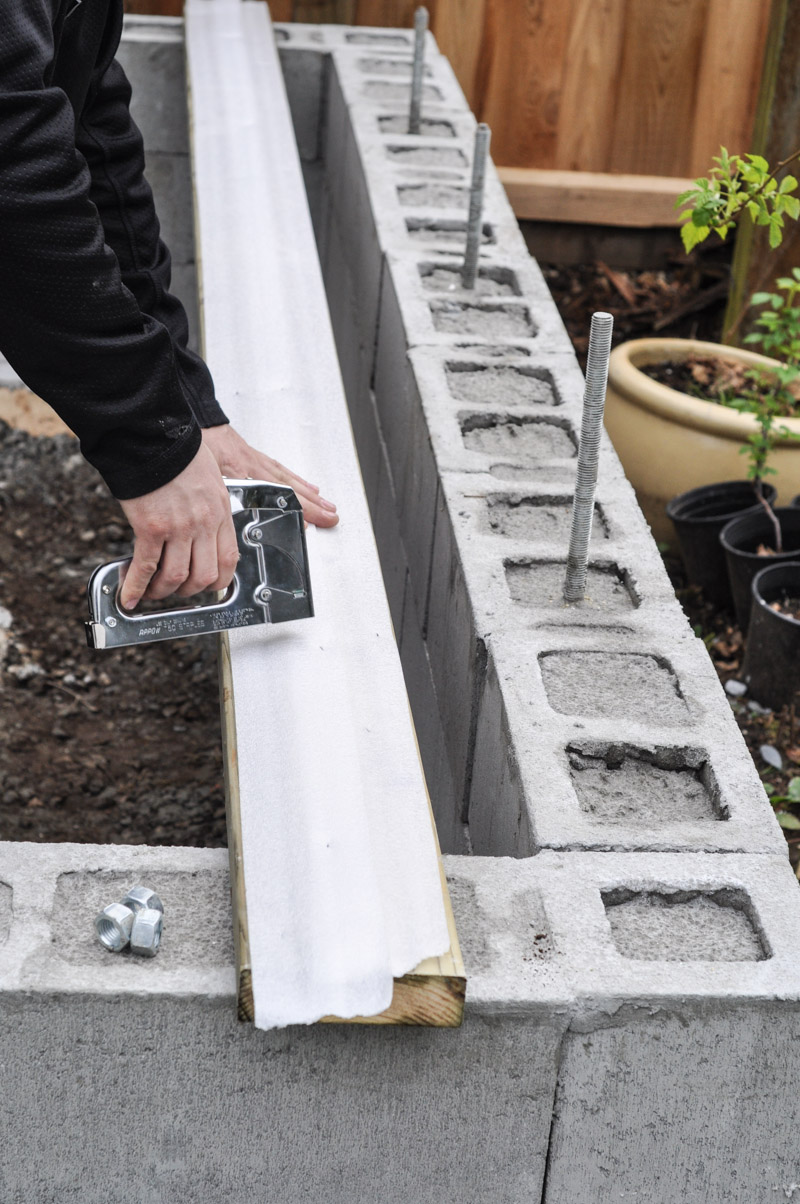
Once the concrete had set, it was time to install the sill plate. A sill plate is a piece of lumber – in this case, a pressure-treated 1X6″ – that the framing of the structure sits on and attaches to. We first rolled out sill gasket – a very inexpensive vapour barrier that will help keep the sill plate from wicking up all of the moisture coming from the brick wall. Then, Mr. Suburble and I used all of our mathematician skills and broke out the hole saw. We drilled holes for the sill plate to slip over the protruding ready bar.
I won’t lie. We sucked in our breath more than once as we hovered the wood over the waiting bolts. But the Greenhouse Fairies were obviously working beside us – as the sill plates snugly fit on top of the ready bar.
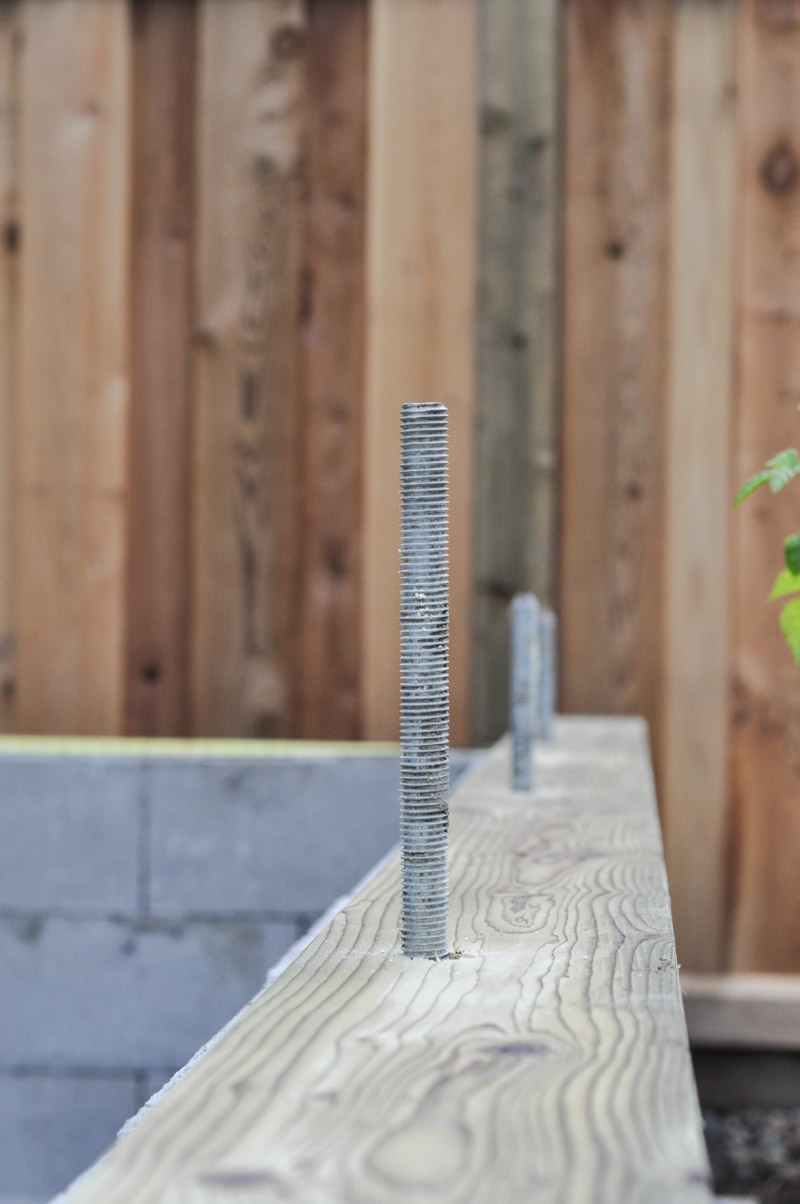
“Seriously? That worked!?!?”
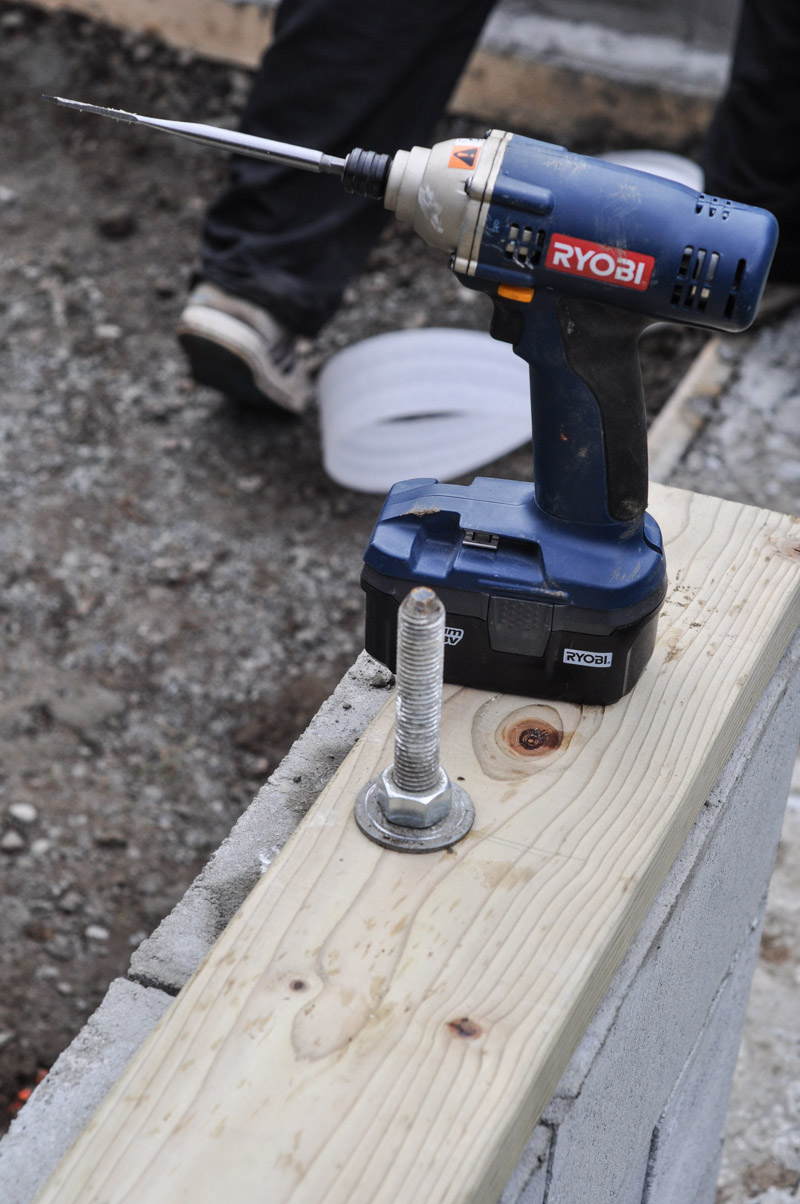
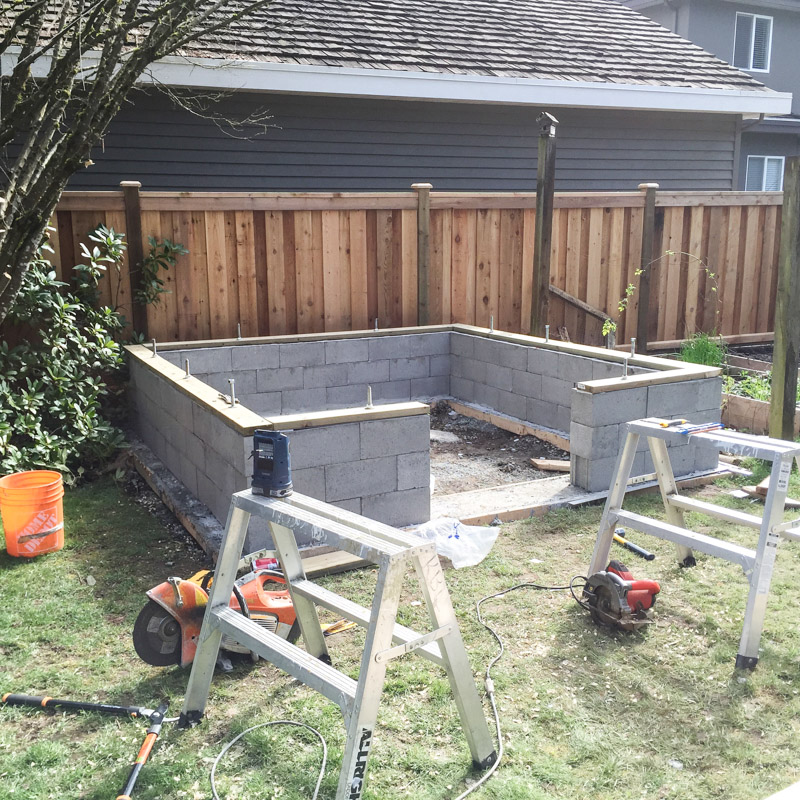
It’s bunker-time!
We high-fived each other and then turned to the next – and possibly most daunting – step: framing.
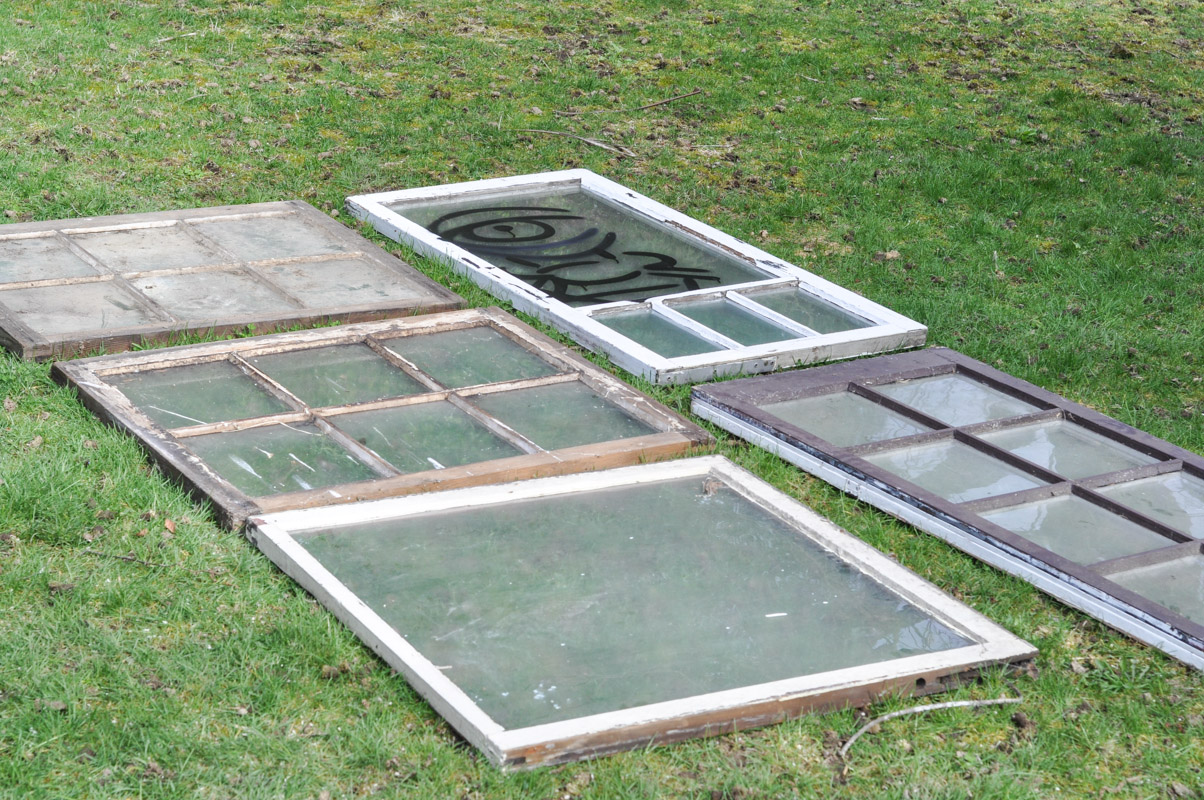
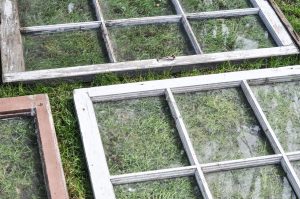
Yep, there was even some sweet graffiti on some of the windows. Beggars can’t be choosers.
When our windows were all different sizes and shapes, and we are two amateur builders with a screw gun and a skill saw… this was bound to be interesting.
We mapped out an idea of how we wanted the windows to look.
If you, too, decide to tackle a green house project, you should remember this phrase, “Relax. It’s only a greenhouse!”
This is very helpful to say to your partner when he is fretting about how we’re going to frame in all of these various sizes of windows. And when your wife exclaims, “Wait! We can’t do that yet – I haven’t stained all of the wood!” Just half-smile and say, “Relax, it’s only a greenhouse…”
And also, “It’s also the weekend and I’m actually motivated to work on this, so let’s just make hay while the sun shines and we can stain the wood later.”
This is why I pulled at least two ab muscles. Because I was painting over my head for three days. Le sigh.
Unlike any builder would ever recommend to you, we decided to frame in the windows as we went, and focus on building a basic skeleton of the walls and the roof.
We just didn’t trust ourselves to frame out every single window space without screwing up. And because our windows had to be hinged (in order to let air flow through on hot days), we had a LOT of leeway in spacing.
So we focused on the roof.
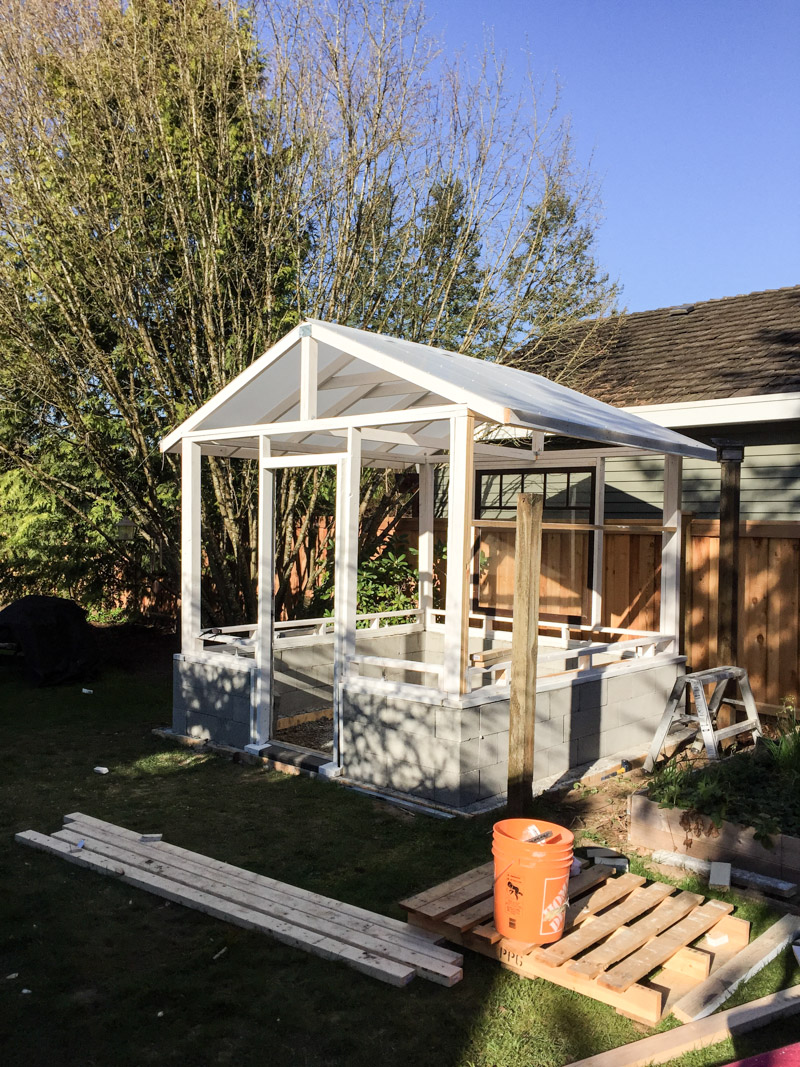
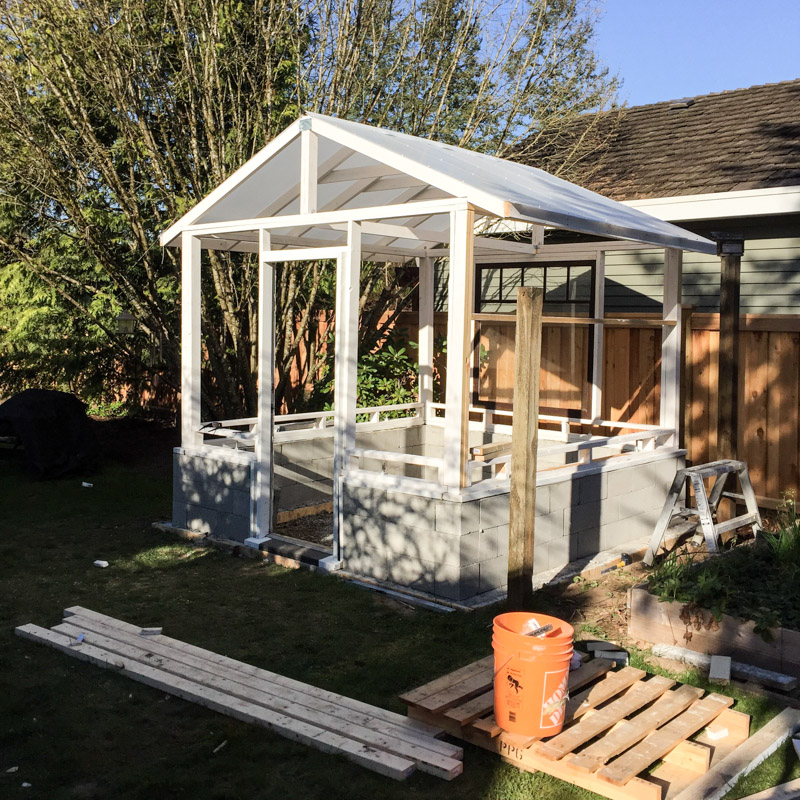
I forgot to take pictures of us building the basic box of the greenhouse. But we built it, and it looks like this.
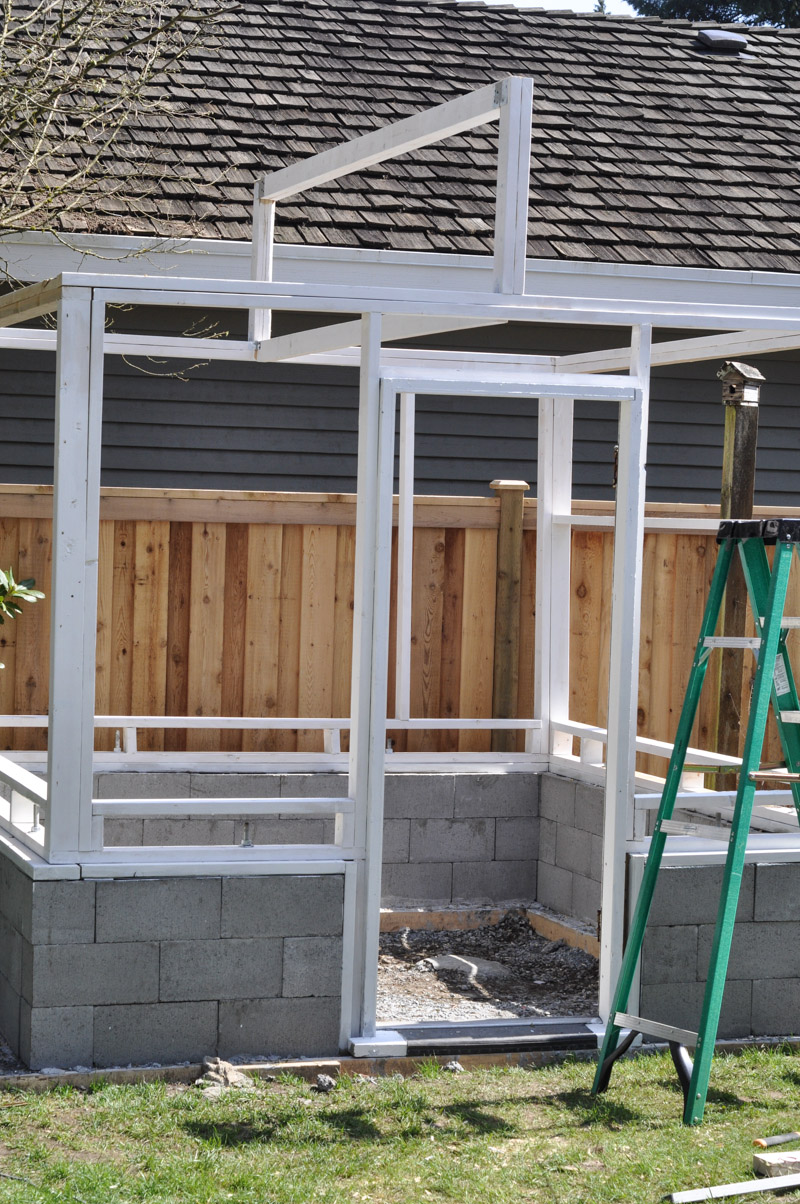
Based on what the girls have made from the wood scraps and rogue tools that have been left around our “greenhouse job site”, I’m pretty sure that everyone can make this too. Just don’t be like us – install your door frame with the door ATTACHED. It’s a huge pain in the butt to plane the door afterwards.
Basic skeleton assembled, we came to the roof.
This was a conundrum for us right from the beginning. We had two options: trusses or shed rafters. I looked on forums, I brought up plans, and I talked to people at the hardware store.
Trusses are great – but they cost a mint when they’re pre-ordered (we were quoted almost half of our entire budget!) – and if you’re not carrying a heavy load on the roof, you can get away with shed rafters.
So we did.
YouTube was an invaluable resource at this time. We watched about fifteen different tutorials, shrugged our shoulders, and then went for it.
Again, I’m not calling us master builders, and if you have a Red Seal in anything, just look away. But if you’re like us, then this is what worked.
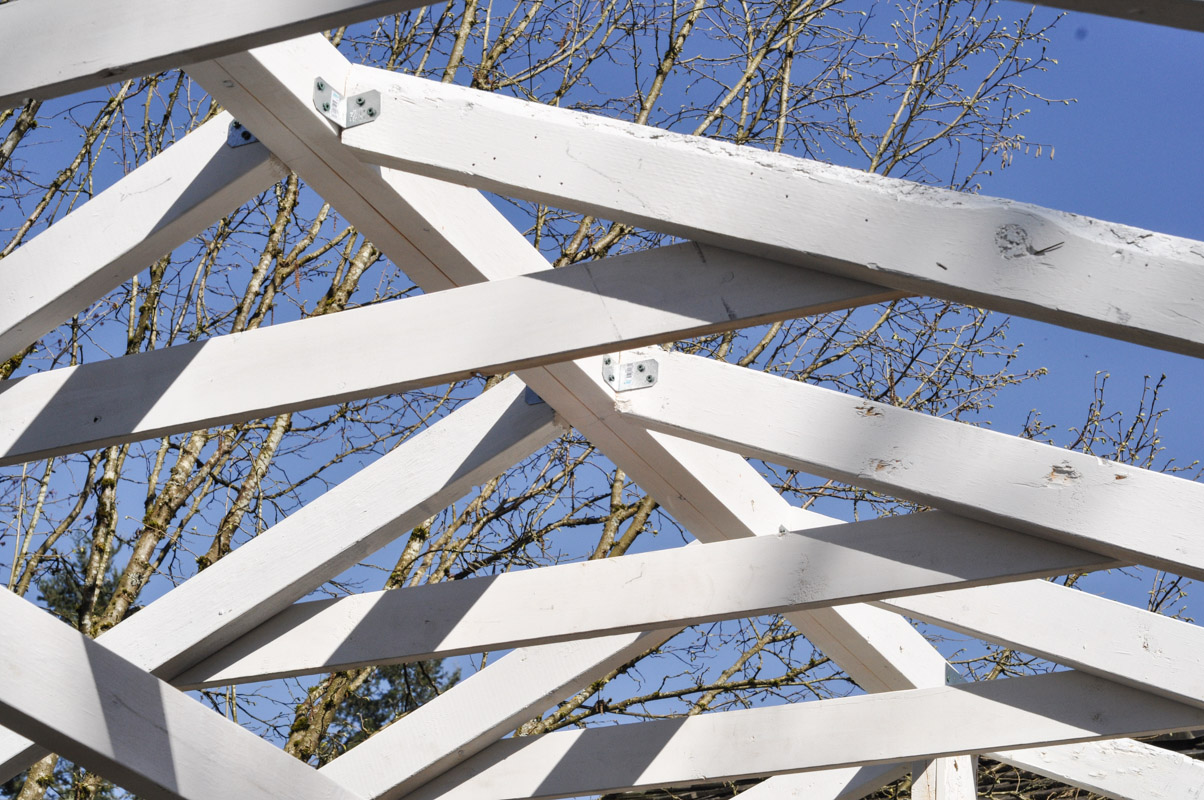
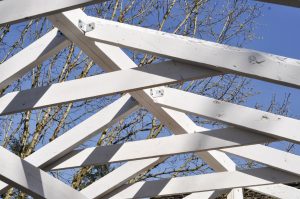
We built up a “peak” in the middle of the roof out of laminated 2X4s. Our angled 2X4 rafters would be attached to this peak with L brackets and 2 1/2″ deck screws. A notch was cut from the rafter to rest on the top of the greenhouse walls.
We cut one rafter, tried it out, and then used it as a template for the remaining pieces. We had most of them up within an hour!
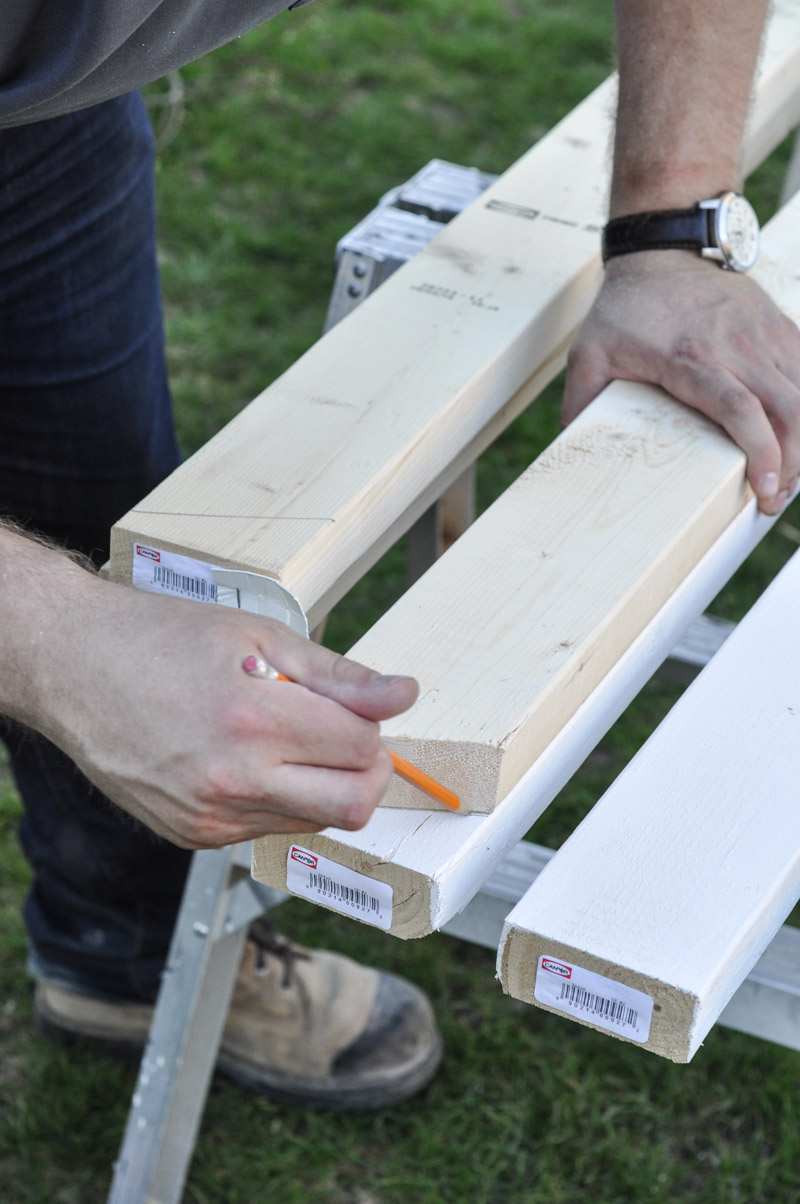
We had read about using a cross-brace (creating an “A”) across the rafters for more support. Again, same story – cut a template, tested it, and then used it to make the remaining braces.
We were on fire!
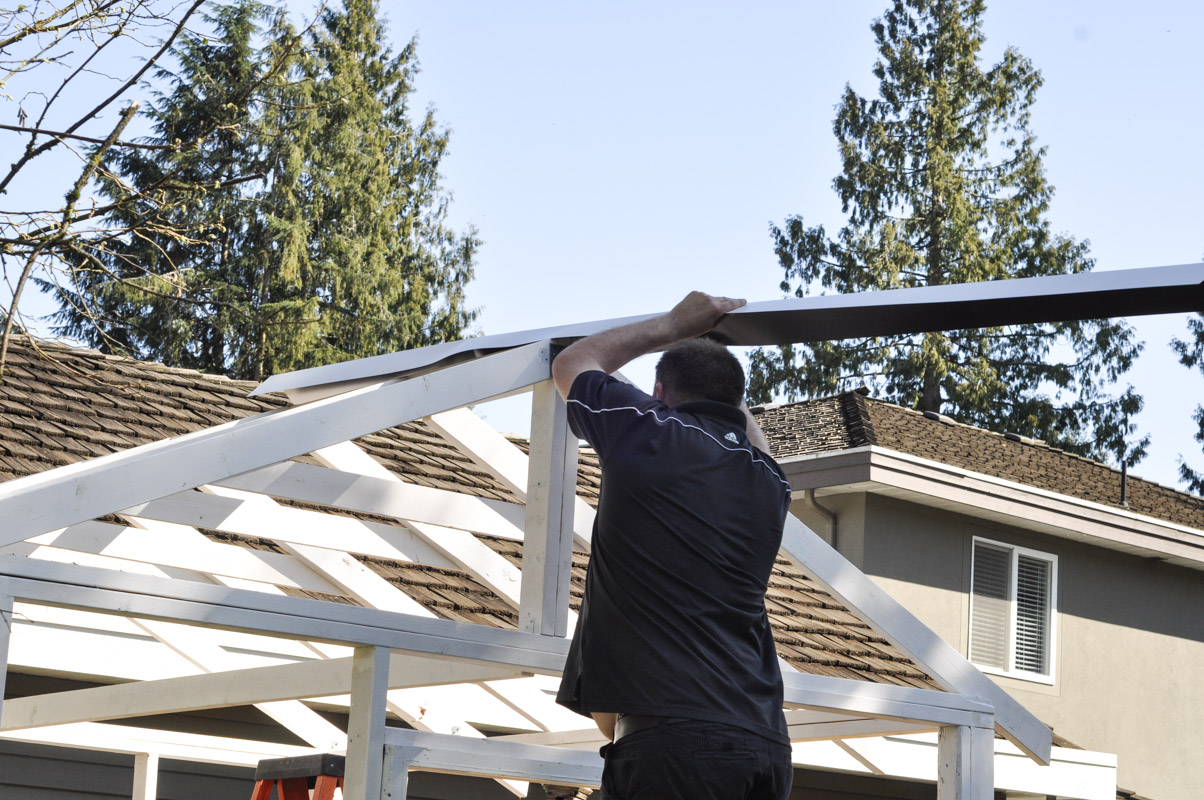
It was Mr. Suburble’s idea to use roof flashing (a ridge cap, I think it’s called?) across the top of the roof in order to weather proof (and ugly proof) our roof.
For roofing material, we used Coroplast sheeting from Home Depot. It comes in both white and “clear” colours – but clear is really not very clear at all. It just lets in the most light – so that’s what we chose. This plastic material is inexpensive and can be cut with a box cutter. We used it as roofing because it let light and heat through, and it was easy to install. We used roof screws with washers to secure the plastic down and prevent water from seeping in through the screw holes.
We slid the sheeting up under the roofcap, and then screwed it down from there. This was an exercise in flexibility and “who has the longest arms?!?”
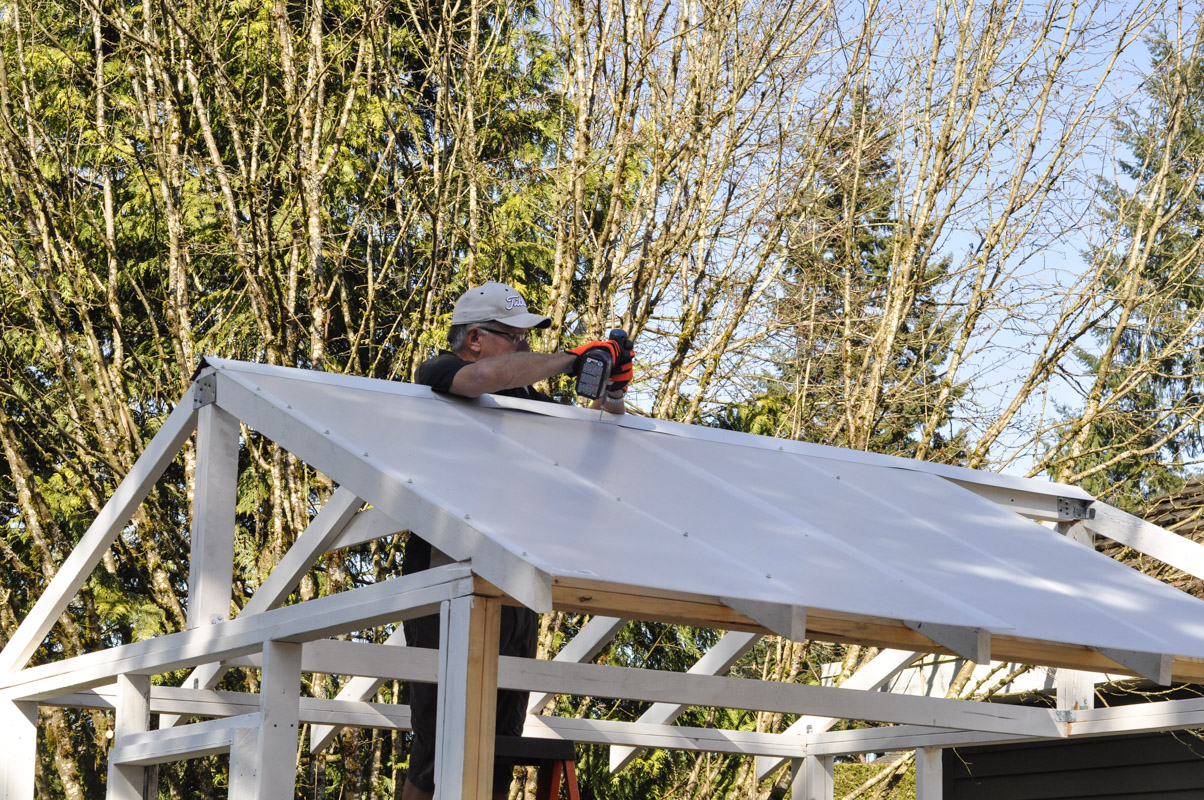
Mr. Suburble’s father – Grandpa Golfer – came over to help us with this part. It was much easier to have three sets of hands on the job when we were working on ladders.
Guess who got to be the gofer?
Yeah. Me. I’m apparently a good screw-fetcher.

And suddenly – the roof was on!
In a fit of productivity, Mr. Suburble and Grandpa Golfer installed a large window at the back of the structure before I could take my progress photos.
It was really coming together. Now it was time to start framing in the walls!
Later this week I’ll be sharing how we turned these empty spaces into walls and windows.
Read the whole greenhouse series!
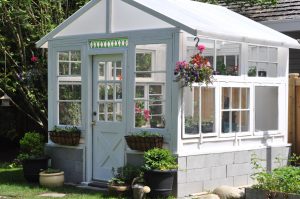
The Finished Product: The Greenhouse!




7 comments
Grandpa
Much more than “Just a greenhouse!” Your mother must be proud.
Tara
Thank you so much, Grandpa! Mom helped a lot with the planning and encouragement. We still can’t believe we built it with our own hands!
Jan
A lot of courage – Good Job Everyone!
Tara
Thank you so much, Jan!
Morgan
First off, these are great pictures. It always helps when you can see each step as it is happening. The baby plants growing in the greenhouse will definitely be grateful for the extra insulation provided in the concrete and cinder blocks-great thinking! Thank you so much for sharing!
Tara
I’m hoping that our somewhat over-built foundation keeps our baby plants toasty warm! I found that so many other greenhouse posts out there missed some steps, so I tried to take as many as I could. That being said, there were times where we got caught up in the building-of-the-greenhouse, and I forgot to break out the camera.
Ruben K Layne
Thanks for sharing Tara!!
It’s really good to watch step-by-step guide of greenhouse, anyone can take idea and get started. Beautiful pictures I must say.
Building a greenhouse requires proper planning and if one have a draft then it can be quite simple to build. Your greenhouse pictures encouraged me a lot.
Lovely!!