Well, here is where I admit a bit of weakness, people. Get your popcorn and your sodas.
I am currently a competitor in the fabulous One Artsy Mama’s One Crafty Contest.
It’s a competition where bloggers create pieces based on the prompts that Amy gives us. Each week, we have four days to create a piece, and then for a day and a half, there is a voting round (which results in some eliminations from the contest). Pretty cool, isn’t it? I created the piece below based on the category of “Paint”.
Sadly, I was voted out of that round. I didn’t earn enough votes.
Whomp whommmmmmp.
But then something crazy happened – a contestant had to drop out of the race – and I was offered another chance to take part in the competition! I humbly accepted the offer, and thus, I’m still a competitor! I ask that you visit Amy’s blog and check out the next round of projects (the category is washi tape), and vote next Monday and Tuesday (’til noon). Maybe I’ll move onto the next round, and maybe I won’t. But I’m excited to compete, nonetheless.
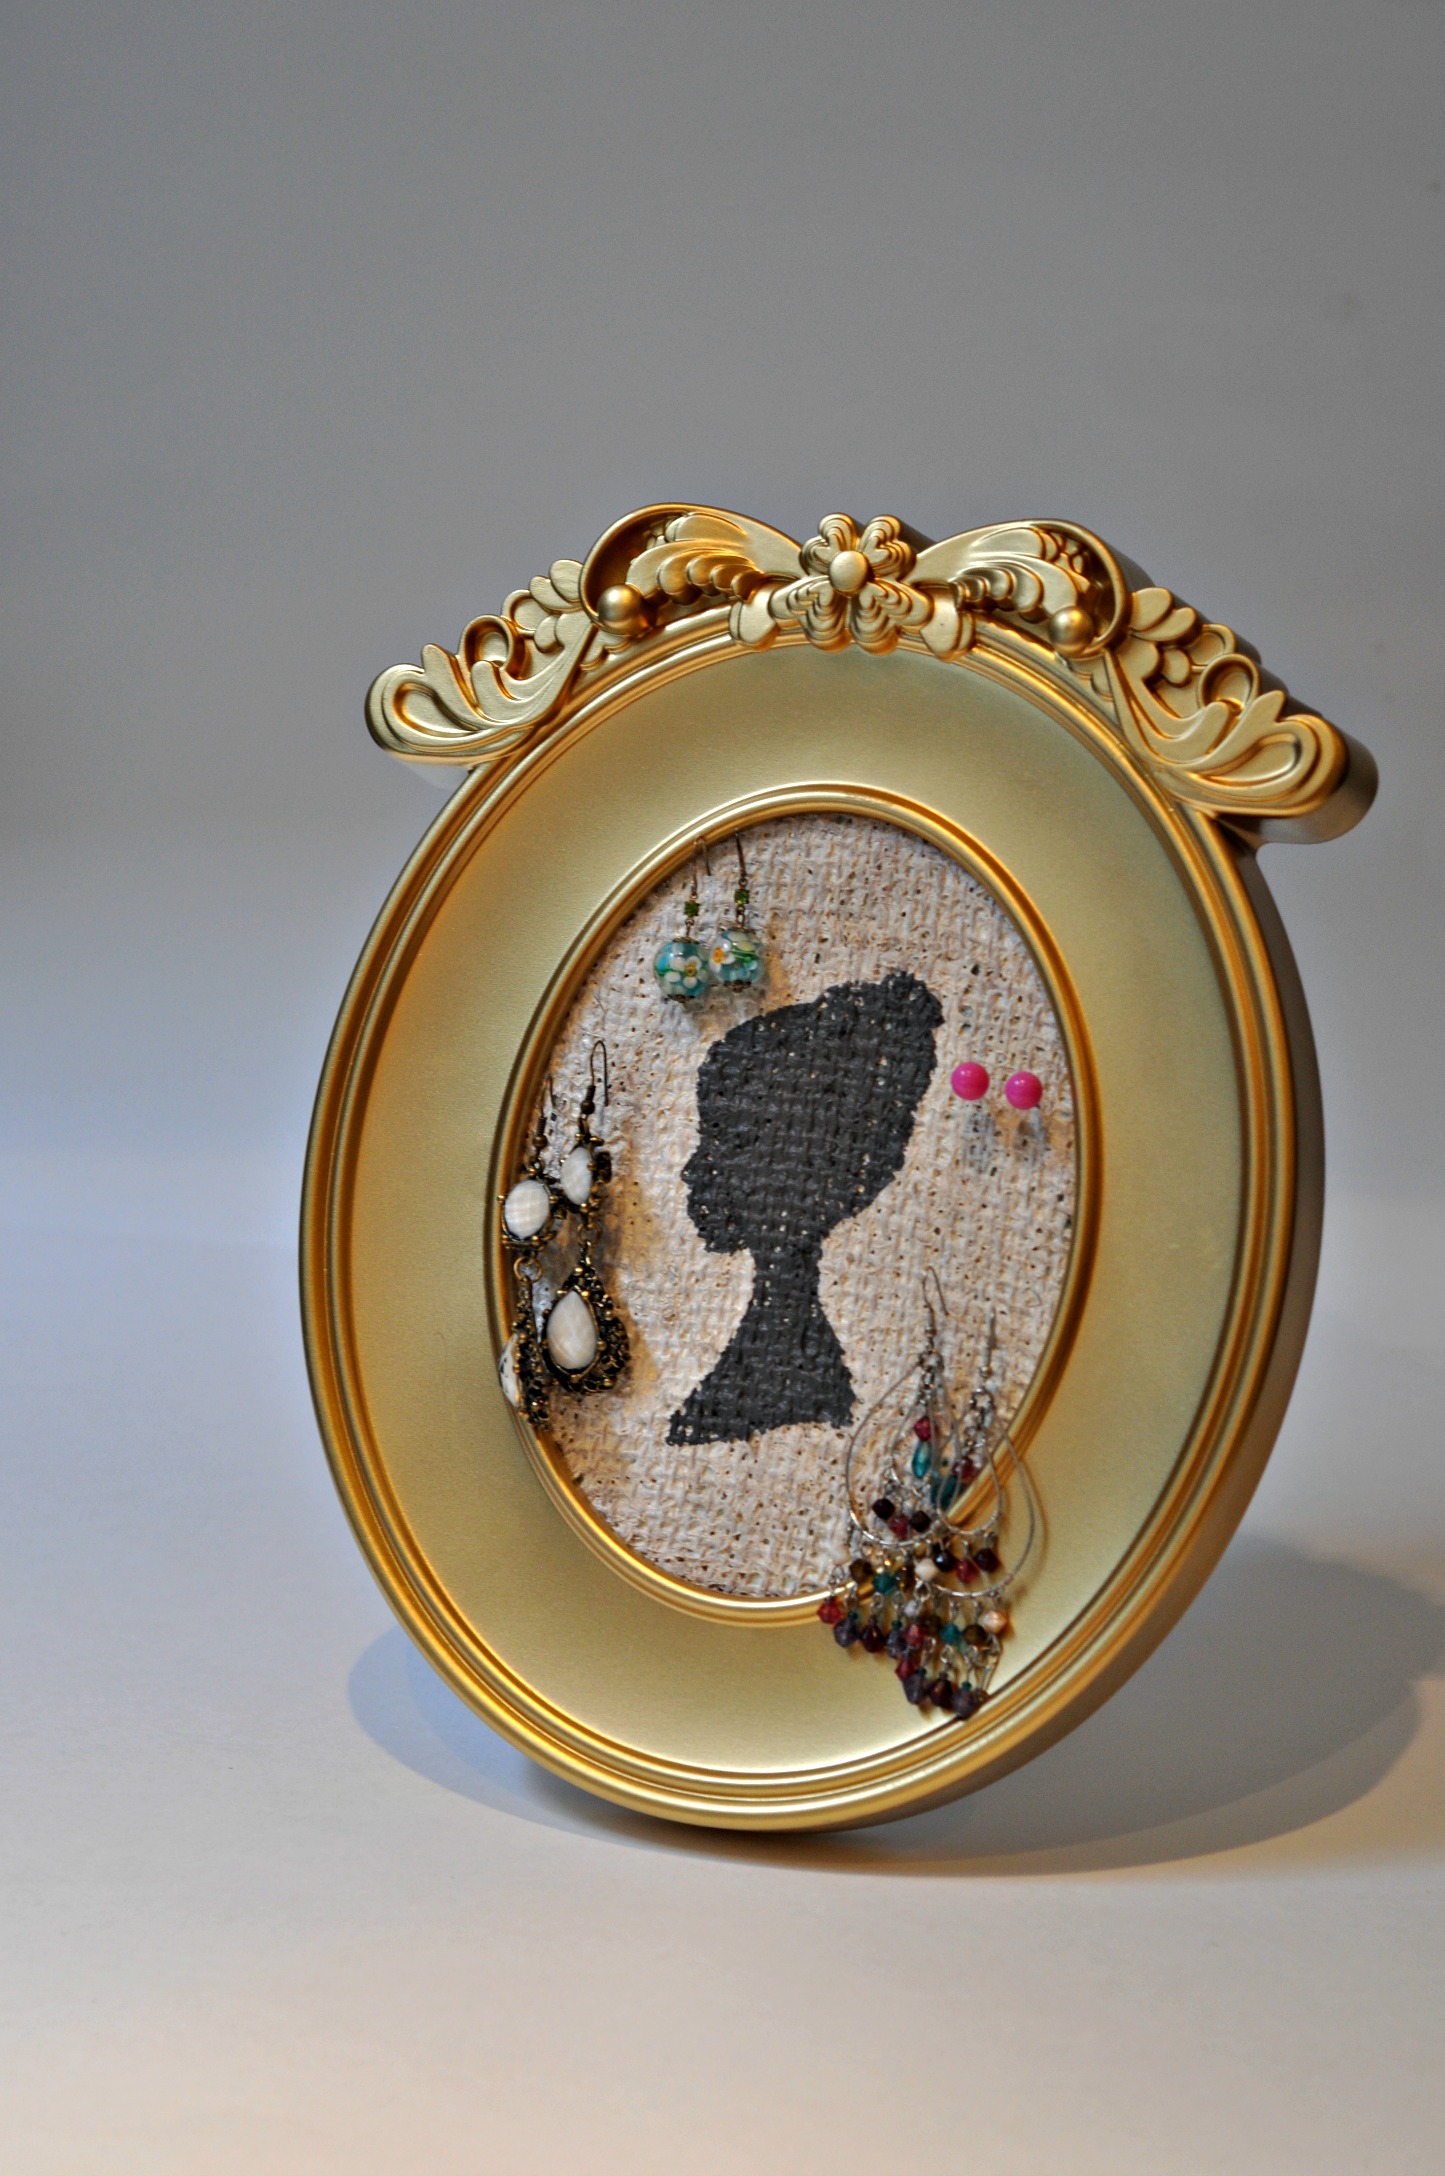
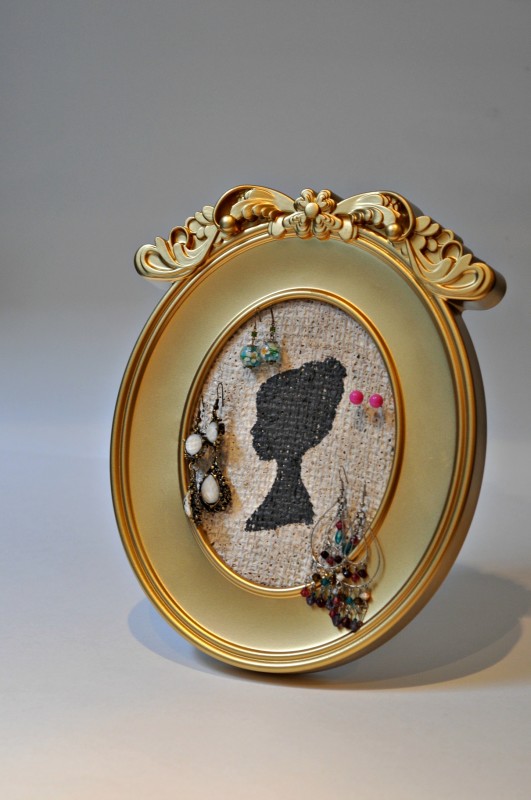
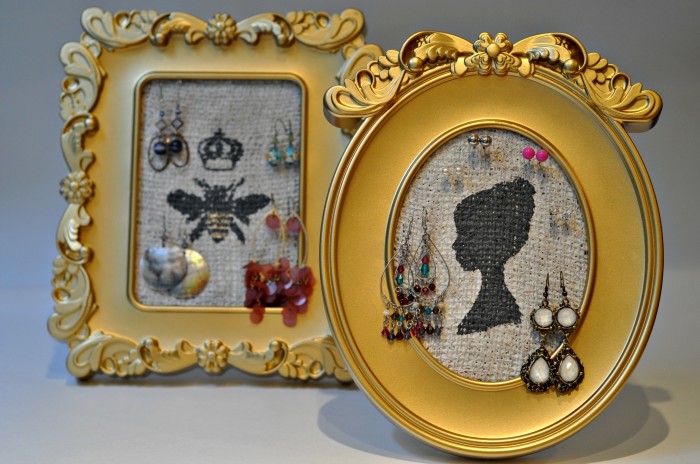
And aside from my dabblings in competitive crafting, I’m still very proud of what I created! Using paint, some Ikea frames that just hadn’t yet reached their potential, and some other bits and bobs from the craft room, I created two snazzy little jewellery organizers to sit upon my dresser.
Here’s how I did it:
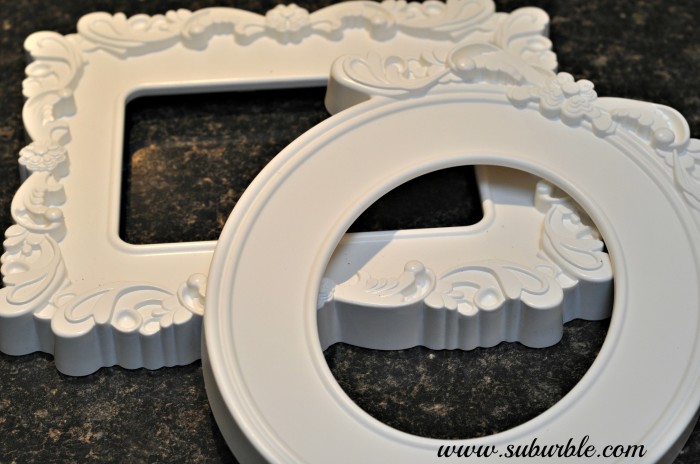
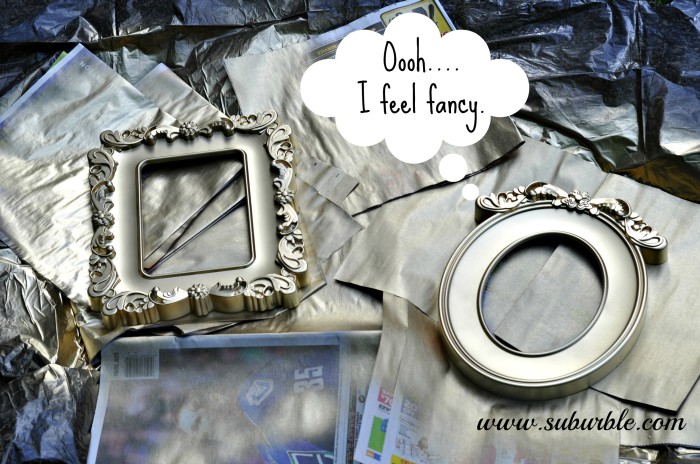
Some of you will recognize these frames. These are plastic Ikea frames that are cheapy-cheapy-cheap. I bought them a while back, and they’ve collected dust ever since. They’re just so plasticky with their original finishes. It’s as if they were meant for a child’s room. I knew that they could be fabulous, but it would take a bit of spray paint-love.
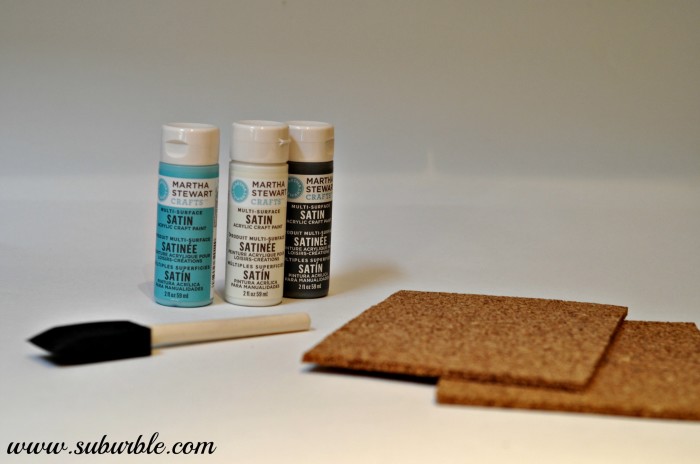
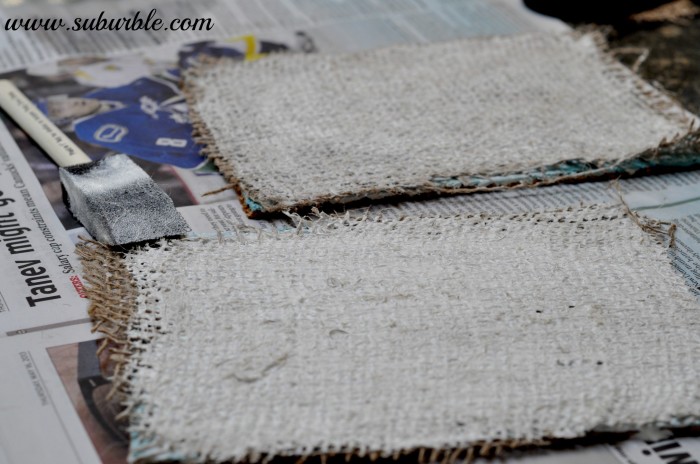
I gathered my materials: some acrylic paint, corkboard cut to 5X7 dimensions, and a foam brush. I also used some burlap, but I didn’t take a picture of that, because it was actually just a sandbag that I had sitting in a pile. Don’t ever underestimate the sandbag. It’s incredibly handy (aside from preventing huge bodies of water from rushing into homes and doing thousands of dollars of damage… if you consider that useful).
Hooray for spray paint! The frames were now glitzy and ready for their close-ups.
I mixed Martha Stewart’s acrylic paint (Summer Linen) with Mod Podge to dilute it and to make it super sticky. I then used this gloopy mixture to affix the burlap onto the corkboard. It worked like a charm. I’m remembering this technique for future projects.
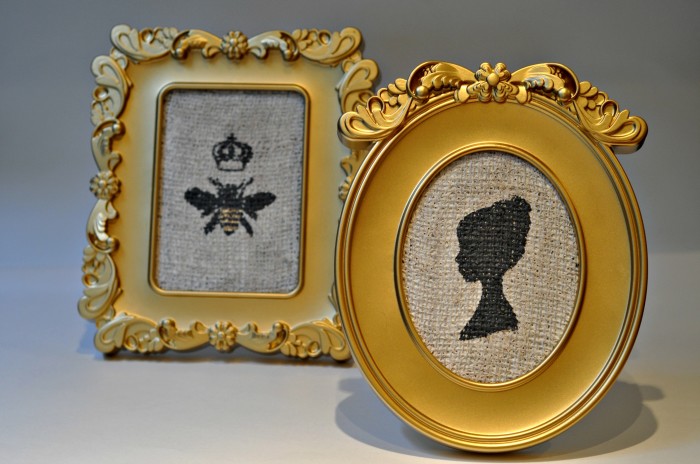
I then used another paint (Martha’s “Arrowhead”) to stencil on an image of a vintage woman’s silhouette and of The Graphics Fairy’s Queen Bee. I loved how both of these images turned out. The lines aren’t entirely crisp, but I think that’s true to the project – it’s supposed to be a bit rough around the edges!
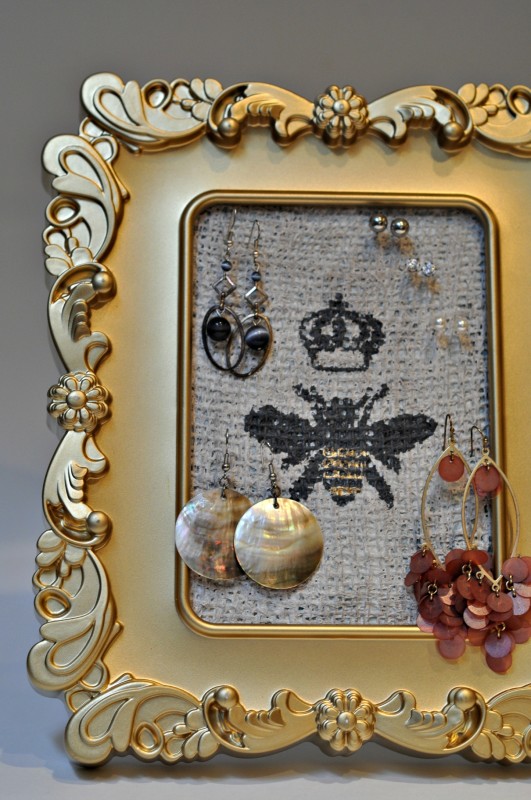
These pieces could stand alone as art (and I have considered that), but there was a reason why I stuck that burlap onto the corkboard. I wanted jewellery to be able to slip into the textured surface; this art also had a purpose.
And it works like a charm.
This cameo is my favourite, I think. So sweet.
Both pieces now sit atop my dresser in my bedroom. I love how they’ve turned out, and I also love how I’ve managed to organize and display my jewellery in a way that isn’t utilitarian and boring. There’s nothing wrong with a little bit of fabulousness when it comes to organizing your stuff.
Plus, I got to use spray paint. I love spray paint.
I share my stuff at these glamourous places.
Follow Along!
Don’t Miss Another Post! Subscribe Via Email!



31 comments
Bethany
Love them! So glad you are still in the running!
Tara
Oh, thank you, Bethany! I’m glad for another chance as well! 🙂
Mel
Oh that’s gorgeous I didn’t know it was you, good luck next round xo
Tara
Thanks, Mel! I’ll probably need that luck! 😉 I’m not counting any chicks before they’ve hatched.
Lisa @ Wine & Glue
I love your new header!!! Also, this is just the cutest project. Love it. I’m so happy you made it to the next round!
Tara
Thanks, Lisa! I’m slowly working on a blog redesign – it’s taking a bit of time (and learning), but the header was done for me. I can’t take credit for that. 😉
Knowing my luck, I’ll probably get knocked out this round. But oh well… at least I have an excuse to play with washi tape!
Alli
Great project! I’m not that crafty, but you have inspired me. I, too, love your header!
Tara
Oh, thank you, Alli! I love the way the project turned out (especially the cameo). The header is fantastic – I agree. I owe it all to Whitney (the designer)!
Justice
average car insurance rates in Bakersfield CA
Randi
I am glad you are getting another chance!!!
Can’t wait to see what you come up with for this challenge!
Tara
Thank you, Randi! We’ll see what happens this round. If I get knocked out again, we’ll know it wasn’t meant to be (and that’s okay). I know I’ve got some stiff competition! 🙂 Looking forward to seeing what you come up with too!
Krista @ thehappyhousie
Adorable and useful too! Such fabulous winning qualities. You have my vote:)
Tara
Krista – you are a doll. I always look forward to your comments!
p.s. I have to be anonymous in the contest. It’s tough to earn votes via friendship that way. 😉
Amy of while wearing heels
These frames are so precious. I knew, immediately, when I saw them in the contest they were yours…why, well…because I loved them! You did an amazing job. I am glad Amy asked you back into the contest. I can’t wait to see what else you create. You deserve it!!!
Tara
Oh, thank you, Amy. You may have also known they were mine because we’re blogging BFFs. Plus, you have a rad sense of style.
(See how I complimented myself there, too?)
I’m so lucky to have you on my team, lady. Can’t wait to read all about Grace’s birthday!
Amy @ StowandTellU
These are absolutely fabulous!! Love them, Tara – you had my vote ~ Amy
Tara
Thanks, Amy! Hopefully I’ll get your vote in the next round! This Washi tape round is going to be an interesting one!
amy @ one artsy mama
Excited to see what you come up with this week! Good luck!
Tara
Thanks, Amy! I’m working on it today! 🙂
Lauren @ The Thinking Closet
These are so lovely, Tara! I agree, just because it’s practical, doesn’t mean it can’t be cute, too! Plus, I’m a fan of any tutorial when you can add a speech or thought bubble to share what the objects are saying (hooray for personification), so this gets an A++ in my book. Thanks for the inspiration! And for stopping by my blog! It’s really fun to get to know you on FB and beyond.
Warmly,
Lauren
The Thinking Closet
Theresa @DearCreatives
Super cute. By themselves or with the jewelry. Come link up sometime at my party if you like.
Tara
Thank you so much, Theresa! I, too, love them either as art alone or as a functional piece! I’ll definitely check out your party – thank you for the invite!
Anga
how did you stick the pattern behind the frame?
Tara
Hi Anga,
Are you asking how I fit the burlap behind the frame? I just used a bit of pressure and eventually, everything snapped together, just as if it was a picture in the frame.
Are you using the same frames? Or are they different? Let me know if I can help!
Bethany
I absolutely adore these!
Tara
Awww… thanks, Bethany!
June
What brand spray paint did you use? The gold looks really good and not too flat in color.
Tara
Hi June! My favourite spray paint is Rustoleum Metallic Gold. It goes on the nicest, I think. 🙂
karin07
What specific paints did you use to get the layered look on your frames?
Tara
Hi Karin, the frames were just spray painted with Rustoleum Gold. The burlap was painted in layers of acrylic paint – a tan and a white. Let me know if you need any more information!
Decor
Woow! It looks fantastic.